Phased Array Services
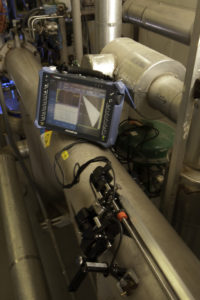
Phased Array sweeps like a searchlight through the object, resulting in a recordable image that reveals defects hidden inside a structure or weld; much like an ultrasound our sonogram used in a hospital.
Phased Array Services
How Phased Array Works
Phased Array Ultrasonics (PAUT) is an advanced ultrasonic technique that permits the shaping and steering of the ultrasonic beam angles, dynamic depth focusing and enhanced beam coverages. The Phased Array beam sweeps like a searchlight through the object, resulting in a recordable image that reveals defects hidden inside a structure or weld; much like an ultrasound our sonogram used in a hospital.
Why Phased Array
Phased Array offers definitive advantages over conventional ultrasonics by providing imaging that can often produce more accurate results, and like most imaging techniques, provides a higher level of reproducible results while minimizing human error. Phased Array also allows for enhanced coverage of a given component or weld from fixed and multiple positions including achieving beam coverage on complex geometries where conventional ultrasonic techniques were inadequate. Some of the many applications for Phased Array are as follows:Advantages of using Acuren Phased Array:
- Faster process than manual ultrasonic testing
- Higher reliability
- Enhanced quality and accuracy
- Increased probability of detection
- No radiation exclusion zone
- Ability to test welds with multiple angles using a single probe
- Data can be captured, stored and referenced at a later date
- Proven, qualified procedures
- New construction; rigorous ASME, API, AWS and other UT in lieu of RT inspections
- Pressure boundary welds; i.e. girth, longseam and nozzles
- Non-pressure boundary welds; i.e. attachment welds, tray welds, gussets, etc.
- In service rigorous on-stream inspection program including high temperature up to 700F
- Pressure vessels, reactors and piping
- Pipeline integrity
- Flanges; graylock, raised face, ring groove, etc. for cracking or corrosion
- Bolts, shafts, pins
- Tube to header welds
- Turbine blades
- Most any other component with an area for access to provide Phased Array
Cost and Quality Benefits of Phased Array
Phased Array delivers significant benefits that improve operational efficiency and potential cost savings:- The most revealing advantage is in the area of “UT in lieu of RT” and the elimination of radioactive sources and the barricading or exclusion zones, including the ability to perform PAUT examinations with minimal impact to construction crews or other work activities.
- Enhanced weld quality when required and enhanced productivity with less crewmembers.
- Enhanced sensitivity for the more critical flaws (non-fusion, cracking) and less sensitivity for the less critical flaws (slag, porosity).
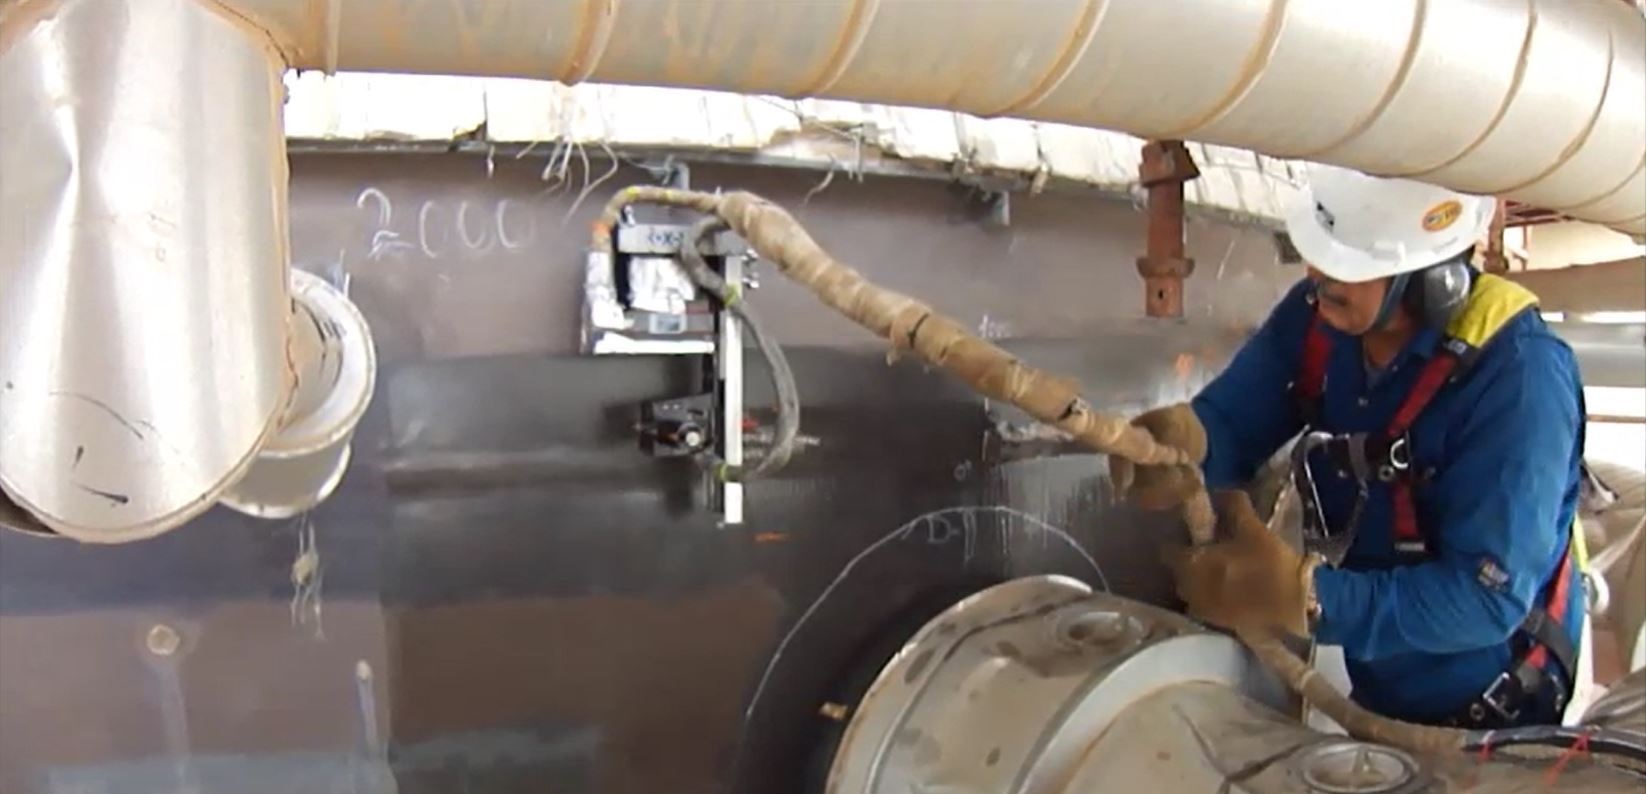
- When combined with Time of Flight Diffraction (TOFD) and our fully automated systems/process, it is not uncommon to achieve 300 – 500 linear feet of weld inspected in one shift with a single crew; ideal for tanks and large vessels.
Why Acuren Phased Array?
Acuren employs 1000’s of qualified NDE technicians with more than 100 Level II phased array qualified. We have one the most robust Advanced NDT programs in the industry constantly meeting or exceeding the challenges of industry performance demonstration examinations. In addition to the requirements of ASNT or ISO certification based programs we have created an endorsement process that includes training, experience and specific procedure indoctrinations in categories such as:
- In-service inspections (PAUT in lieu of conventional UT)
- UT in lieu of RT for ASME piping
- UT in lieu of RT for ASME pressure vessels
- High Temperature PAUT for in-service crack detection, sizing & monitoring at temperatures up to 750F.
 Data integrity and review. When choosing Acuren we have the capability to provide peer review, oversight and when needed Level III review and sign off often before the crews even leave site. Our Acuview concept was established to manage and control the flow of data while providing a higher level of integrity and product deliverable to the client.
Proven procedures. Phased array from Acuren has been incorporated into the Proven Qualified Procedures of numerous corporations and is approved for code compliance inspections by AWS, API, and ASME.
High Temperature Phased Array and the Acuren Advantage
Acuren has a solution for high temperature Phased Array applications. We invite you to speak to our high temperature specialists to discuss your particular circumstance and application. Our system is a fully integrated solution combining special equipment, probes and wedges designed to for inspection on in-service vessels, reactors and piping at elevated temperatures up to 400 °C (750 °F).
- To address the need for a variety of temperature ranges and part sizes, several options are available – angle or normal beam as well as for curved surfaces.
- No shut down required while performing weld inspections and corrosion mapping.
- Encoded automated and manual scanning for consistency and repeatability.
- Efficient cooling system design prevents damage to the probe and scanner.
- Our wedges have been designed to carry out manual as well as automated inspection.
- The special high temperature materials have a safety margin to accommodate some temperature fluctuation.
- Wedges available for weld as well as zero degree corrosion inspections.
- Wedge material, in combination with the probe cooling system, allows continuous inspection with no duty cycle required.
- Scanner with magnetic wheels designed to operate up to 400 °C (750 °F) and enables the operator to spend minimal time in contact with high temperature components, increasing both safety and scan quality and repeatability.
Our system is a fully integrated solution combining special equipment, probes and wedges designed to for inspection on in-service vessels, reactors and piping at elevated temperatures up to 400 °C (750 °F).
Partner With an Industry Leader Today
Our experienced service providers are ready to deliver innovative, reliable solutions tailored to enhance your efficiency, reduce risks, and optimize costs.
Contact Acuren
Additional Services
Advanced NDE/NDT
Acuren’s advanced NDT/NDE services, tooling and proprietary software solutions reduce the cost of inspections by using innovative technology.
Learn More →Radiographic Testing (RT)
Acuren’s breadth of radiography services ranges from portable units to large radiographic bays and our linear accelerator.
Learn More →Ultrasonic Testing (UT)
Acuren’s ultrasonic technicians use innovative technology to detect internal flaws and characterize materials.
Learn More →Success Stories
Tank Refurbishment Project Saves Client Over $100,000
Summary This large refining customer is a crude oil refinery located in North America. Acuren has been the primary NDT, inspection and materials engineering service provider to them since 2010,...
Learn More →Acuren’s High Temperature Phased Array Outperforms the Competition
Over the course of 2 years, Acuren’s high temperature phased array specialist team saved a Saudi Arabia client an estimated excess of $5,000,000 in costs that would have been incurred...
Learn More →Flare Stack - Extending Operating Life of Critical Legacy Asset
Integration across Acuren service lines achieves cost-effective and timely asset life extension This oil and gas customer had a 60-year-old flare stack with cracking and corrosion that was approaching its...
Learn More →